Quantcast
Channel: IT-Idea
Viewing all 62 articles
Browse latest View live

Issue sorting links and documents based on Title

$
0
0

In one of my recent projects we faced the issue of showing documents and links together using a Content Search Webpart. The results had to be sorted alphabetically on the Title property.

Nothing fancy, so you think, I thought so too…

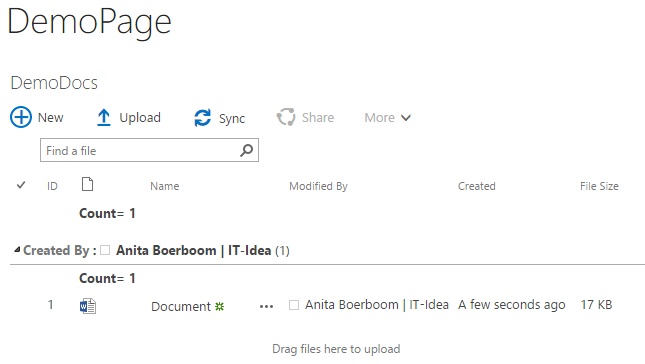
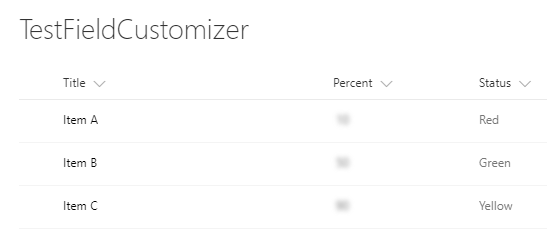
The result was that the Content Search Webpart first displayed all the links sorted alphabetically and then displayed all the documents sorted alphabetically.

CE_Before_ShowDocumentCE_Before_ShowLink

After some research it seemed the title of the link had a leading space. Sorting will follow [0-9A-Za-z] so items with a leading space will appear before any letters.
A link consists of a url and a description part and is stored as ‘url, description’ (SPFieldUrlValue). So the separator between the url and the description seems a comma and a space.

Appearently the Search Crawler is separating only on the comma, which leaves a leading space.

To fix this issue I had to create a custom content enrichment service. A custom service gives me the ability to modify the managed properties of the crawled items before they are added to the search index. The image below shows a part of the proces that takes place in the content processing component, published on MSDN.

Content enrichment within content processing

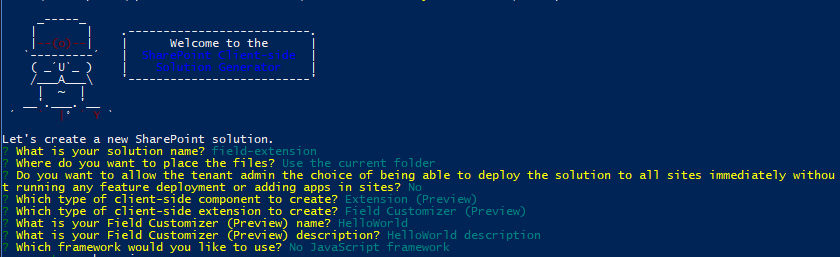
Creating the service itself is not a real challenge, follow these steps:

  • Create a WCF Service Application in Visual Studio
  • Add a reference to Microsoft.Office.Server.Search.ContentProcessingEnrichment.dll (\Program Files\Microsoft office servers\15\Search\Application\External)
  • Delete IService1.cs
  • Inherit IContentProcessingEnrichmentService in the Service1.svc.cs to accept requests from the content processing component.
  • Delete the existing code in the class and implement the method ProcessItem. This is the method where you get the required properties for each item.
// Defines the name of the managed property 'Title'
private const string TitleProperty = "Title"; 

// Defines the error code for managed properties with an unexpected type.
private const int UnexpectedType = 1;

// Defines the error code for encountering unexpected exceptions.
private const int UnexpectedError = 2;

private readonly ProcessedItem processedItemHolder = new ProcessedItem
{
    ItemProperties = new List<AbstractProperty>()
};

public ProcessedItem ProcessItem(Item item)
{
    processedItemHolder.ErrorCode = 0;
    processedItemHolder.ItemProperties.Clear();
    try
    {
        // Iterate over each property received and locate the property we configured the system to send.
        foreach (var property in item.ItemProperties)
        {
            if (property.Name.Equals(TitleProperty, StringComparison.Ordinal))
            {
                var title = property as Property<string>;
                if (title == null)
                {
                    // The title property was not of the expected type.
                    // Update the error code and return. 
                    // Errors can be found in ULS, filter on 
                    // message contains Microsoft.Ceres.Evaluation.DataModel.EvaluationException                    
                    processedItemHolder.ErrorCode = UnexpectedType;
                    return processedItemHolder;
                }
                if (title.Value.StartsWith(" "))
                {
                    title.Value = title.Value.TrimStart();                   
                    processedItemHolder.ItemProperties.Add(title);
                }
            }
        }
    }
    catch (Exception)
    {
        processedItemHolder.ErrorCode = UnexpectedError;
    }
    return processedItemHolder;
}

The item.ItemProperties contain all the input properties received by the service. These input properties will be configured by PowerShell lateron.
The code checks if the Title property starts with a space, trims it when appropriate and returns the changed value to the content processing component.

When exceptions are thrown these will be thrown by ‘ContentProcessingEnrichmentClientEvaluator’ and are of type ‘Microsoft.Ceres.Evaluation.DataModel.EvaluationException’. Use this to monitor the ULS.

  • Add following in <system.servicemodel> in the web.config file
&lt;bindings&gt;
  &lt;basicHttpBinding&gt;
    &lt;binding maxReceivedMessageSize = &quot;8388608&quot;&gt;
      &lt;readerQuotas maxDepth=&quot;32&quot;
        maxStringContentLength=&quot;2147483647&quot;
        maxArrayLength=&quot;2147483647&quot;
        maxBytesPerRead=&quot;2147483647&quot;
        maxNameTableCharCount=&quot;2147483647&quot; /&gt;
      &lt;security mode=&quot;None&quot; /&gt;
    &lt;/binding&gt;
  &lt;/basicHttpBinding&gt;
&lt;/bindings&gt;
  • Host the service in IIS by creating a virtual directory and map it to the physical path of the WCF service application. Convert it to an application by right clicking and selecting  ‘Convert to Application’
  • Configure the Search Service Application to use the Content Enrichment service by using PowerShell:
$ssa = Get-SPEnterpriseSearchServiceApplication
$config = New-SPEnterpriseSearchContentEnrichmentConfiguration
$config.Endpoint = &quot;http://localhost:8081/Service1.svc&quot; #url of the service
$config.InputProperties = &quot;Title&quot;
$config.OutputProperties = &quot;Title&quot;
$config.Trigger = 'StartsWith(Title, &quot; &quot;)'
$config.FailureMode = &quot;Warning&quot;
$config.SendRawData = $True
$config.MaxRawDataSize = 8192
Set-SPEnterpriseSearchContentEnrichmentConfiguration –SearchApplication $ssa –ContentEnrichmentConfiguration $config

#Get-SPEnterpriseSearchContentEnrichmentConfiguration -SearchApplication $ssa

#Remove-SPEnterpriseSearchContentEnrichmentConfiguration –SearchApplication $ssa

It is important to set a meaningful tigger, because calls to the service are synchronous which means the search engine blocks until the item is processed or a timeout occurs. This happens on every single item that is passed to the Content Enrichment Service by its trigger.

  • Run a full crawl

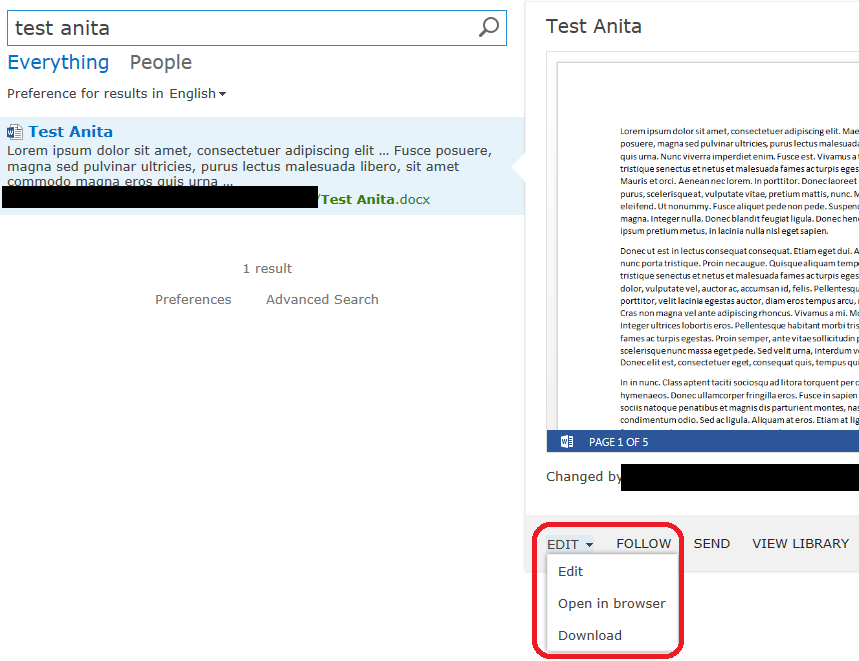
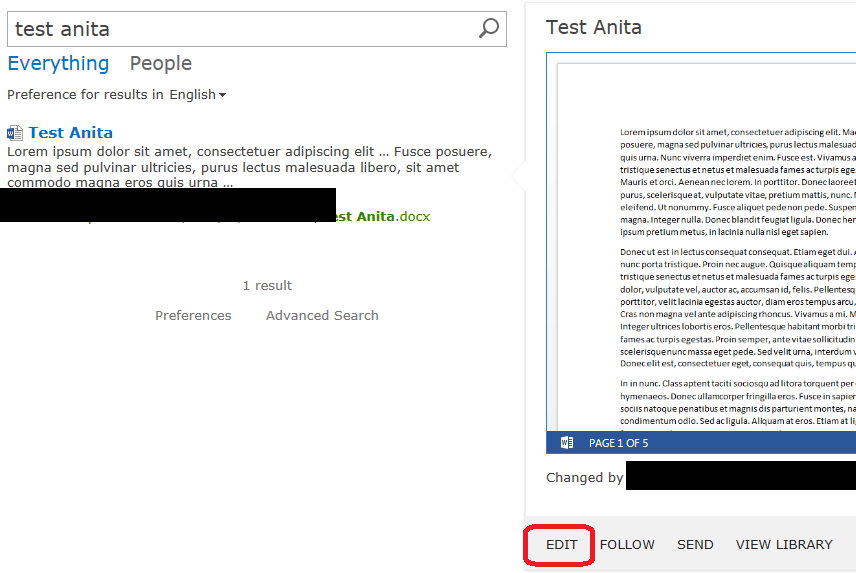
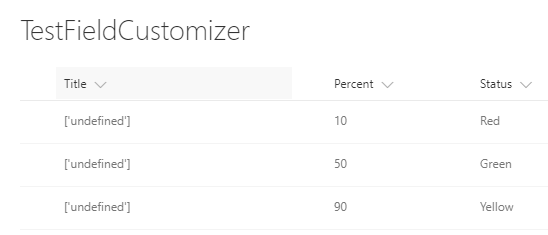
Now documents and links are truly sorted alphabetically:

CE_After_SortingOk

Do not deploy the service in a SharePoint webapplication

Sharepoint webapplications are authenticated resources, while the Content Processing pipeline invokes the Content Enrichment web service by anonymous service calls. So deploy the Content Enrichment web service in an anonymous IIS website. Otherwise the exceptions ‘Failed to send the item to the content processing enrichment service.’ and ‘The remote server returned an error: (401) Unauthorized.’ can be found in the ULS.

Summary

Creating a custom Content Enrichment Service isn’t that hard, but I find it disappointing I had to do so for the particular problem we faced:
Sorting links and documents based on title and showing them alltogether in one Content Search webpart.

Update 07/11/2014

Since upgrading from March CU 2013 to SP1 and September 2014 CU updating the Title managed property suddenly stopped working. Somewhere in a CU Microsoft changed the behavior of updating some system managed properties without communicating about it. You can read more about it over here.
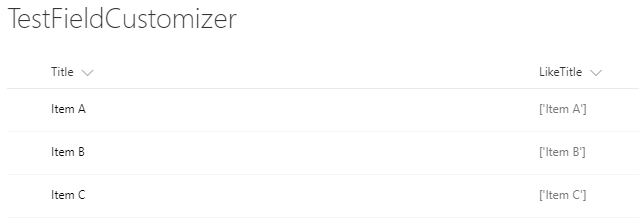
The solution is to create your own managed property, copy the settings from the Title managed property and sort by this one…


Visually show shared documents

$
0
0

Files stored in Office 365 or SharePoint Server 2013 can be shared with other people. Although this isn’t new, it is a great feature and never has been easier to use.

Governance-wise sharing can be a challenge, because you’re unable to see, when looking at the files in a document library, which files are shared. Ofcourse the document library settings page can give an overview, but that’s about 4 clicks too far away.

SharingDocLibSettings

On the other hand OneDrive for Business shows which files are shared by you with a nifty icon.

SharingOneDriveForBusiness

It would be nice to see the same behavior of showing which files are shared, or in the old fashioned term showing unique permissions, on a file outside OneDrive for Business.

This can be accomplished by implementing two components: a custom rendering template using javascript and a column to show the icon in.

The column is used to override in the template to show the icon when the file is shared. This one is created manually, because of this demo purpose.

Just create a field as you normally should, name it ‘Sharing’ and choose a ‘Single line of text’ type. To be able to see this column in the view you’re working with adjust this view to show the ‘Sharing’ column.

The custom rendering template is created using javascript. The first step is to define:

  • the field to override: ‘Sharing’
  • a render method: ‘ITIdea.SharingFieldOverride’
  • for the view you want to control, in this case the ‘View’ of the field.

Finally the RegisterTemplateOverrides method is called to apply the custom view.

(function () {
var overrideField = {};
overrideField.Templates = {};
overrideField.Templates.Fields =
{
"Sharing": { "View": ITIdea.SharingFieldOverride }
};

SPClientTemplates.TemplateManager.RegisterTemplateOverrides(overrideField);

})();

The above function is a so called immediately-invoked function expression (or IIFE) or anonymous self-executing function.

All that is left to be done is to implement the render method ‘ITIdea.SharingFieldOverride’.

The most exiting thing here is to determine the unique permission of a file. For this a REST call is used. This call is fired for every document in the view so this is probably the reason it isn’t implemented by default.

First the REST endpoint is put together using the url, list id and the id of the current item. Then the Ajax call is fired and depending on the unique role assignments of the file some HTML is formatted.

ITIdea.SharingFieldOverride = function (ctx) {
var url = _spPageContextInfo.webAbsoluteUrl;
var requestUri = url + "/_api/web/lists('" + _spPageContextInfo.pageListId + "')/items(" + ctx.CurrentItem['ID'] + ")/hasuniqueroleassignments";
var returnHtml = "";

jQuery.ajax({
url: requestUri,
type: 'GET',
headers: { 'ACCEPT': 'application/json;odata=verbose' },
success: function (result) {
if (result.d.HasUniqueRoleAssignments) {
returnHtml = "<a href='#' onclick='onSharingHintClicked(this); return false;' aria-label='Shared with some people'>";
returnHtml += " <span style='height: 16px;width: 16px;display: inline-block;overflow: hidden;position: relative;'>";
returnHtml += "  <img src='/_layouts/15/images/spcommon.png?rev=23' title='Shared with some people' style='left:-254px;top:-30px;position:absolute'/>";
returnHtml += " </span>";
returnHtml += "</a>";
}
else {
returnHtml = "<a href='#' onclick='onSharingHintClicked(this); return false;' aria-label='Only shared with you'>";
returnHtml += " <span style='height: 16px;width: 16px;display: inline-block;overflow: hidden;position: relative;'>";
returnHtml += "  <img src='/_layouts/15/images/spcommon.png?rev=23' title='Only shared with you' style='left:-200px;top:-30px;position:absolute'/>";
returnHtml += " </span>";
returnHtml += "</a>";
}
}
});
return returnHtml;
};

The style on the html elements are the exact style items from OneDrive for Business to create the same user experience.

I used inline styles instead of the classes OneDrive uses, becasue of the early loading of this javascript file. It loads that early in the page lifecycle the css files aren’t there yet.

The last things to do are to upload the javascript file to the style library (or some other place) and reference the file at the list view using the JSLink property. Since jQuery was used in the javascript file, a reference to jQuery is also necessary to make things work. Note that dependent files have to be referenced first, so jQuery first, use a ‘|’ as separator and then reference the custom rendering template, like ‘~sitecollection/Style Library/_itidea_jslink/jquery-2.0.0.js|~sitecollection/Style Library/_itidea_jslink/SharingTest.js’.
~sitecollection refers to the url of the parent site collection.

The final result is the same as OneDrive for Business, shared documents show the ‘Shared with some people’ icon, others show ‘Only shared with you’ icon:

SharingCustomRenderingTemplate

Summary

Custom rendering templates are a neat way of showing, in this case, additional information. A ton of other stuff can be done with it, showing readonly fields in edit mode, implement custom validation and much more.

As I mentioned previously this functionality is probably an intensive process when a lot of documents are stored in the library, because the call is fired for every document.

Showing if an item is shared works as wel on files and folders. Keep in mind that showing if an item in shared is an item thing. What I mean to say is that when a sharing icon is shown at a folder level, it doesn’t mean all the files in the folder are shared. Out-of-the-box OneDrive for Business functionality.

Quick tip exporting a webpart

$
0
0

Some webparts can’t be exported by the UI to get the XML representation of it.

Listview webparts are one of them. To get the XML anyway there are three options to do so:

  1. Use javascript from the Export option
  2. Use the exportwp page directly
  3. Enable the Export functionality

Javascript

For listview webparts the Export option is present, although not visible. Inline style ‘display:none;’ prevents showing the Export option, but it can be found using the browser’s developer tools.
ExportWPJavascriptInlineStyle_Id

The easiest way to find it is to search for ‘MSOMenu_Export’ in the HTML of the page.
To easily export the XML representation of the webpart copy the call in the onmenuclick javascript. (include javascript: before the call)
Open the webpart menu as if you were going to export it and paste the javascript into the URL section of the browser and hit enter. You will be prompted to save or open the webpart file.

Exportwp page

Another option is to use the exportwp.aspx page, located in the _vti_bin folder, directly. Directly, because the javascript above also uses this page, take a closer look at the code there.
ExportWPJavascriptParameters

Parameters are the page url and guidstring, which is the guid of the webpart. The javascript gathers all the data for us, but we can also format the call by ourselves.

Get the webpartid from the developer tools:

ExportWPWebPartId

And format the url:

<url of the web where the page is stored>/_vti_bin/exportwp.aspx?pageurl=<absolute url of the page where the webpart is placed on>&guidstring=<id of the webpart>

Enable Export

The last and faremost the easiest way is to enable the Export functionality of the webpart. Not in the webpart properties, but in the developer tool of the browser:

ExportWPEnableExport

Set this property to true and the Export menu option is available and working.

Summary

There are several ways to export a webpart when the Export option isn’t available in the menu of the webpart. To enable this is the faremost easiest option when it is available. Otherwise the user of the exportwp page is a close second.


Creating a custom multi-valued refiner

$
0
0

In one of my previous posts I wrote about extending the content processing pipeline by developing a custom content enrichment service to modify the managed properties of the crawled items before they are added to the search index. This post is a kind of follow up on that.

Suppose sites can be tagged by one or more terms. Users are able to set and modify these terms.

On a page with a content search webpart and a refinement panel users can search content and use the refinement panel to find sites (also) tagged with these terms.

These terms are stored in a propertybag, added to the indexed properties keys and exposed by a managed property.
The propertybag values for three different sites are:

CE2_Propertybag_Values

To point some values out: The term ‘site02|..’ is used twice (at site 01 and site 02) and the term ‘site04|..’ is used once (at site 03).

The managed property is added to the refinement panel and configured to use the multi-value refinement item display template.

CE2_Original_ManagedProperty_In_RefinementPanel

As you can see in the above image the managed property containing the terms isn’t really multivalued, because of the values of the propertybag are stored as a single string. Notice the missing ‘site04|…’ in the refinementpanel, which is present in the propertybag shown in the PowerShell image. Creating the managed property as a multivalued property won’t help you create a real multivalued property.

A content search webpart in conjunction with this refinement panel will show only one site at the time when eg selecting ‘site02|..’ which is used twice and should result Site 01 and Site 02:

CE2_Original_ContentSearch

Refining results based on these values will only match sites when they are tagged with the same terms in the same order: the exact same string.

A possible solution for this is to extend the content processing pipeline by a service. This service picks up the propertybag value and splits the values, in this case the terms, and inserts the separate values into the multivalued managed property.

The basics of how to set up a custom content enrichment service is explained in the post ‘Issue sorting links and documents based on Title

Only the code for the service itself is shown. This is the service which accepts requests from the content processing component.

private const string
SiteTagProperty = "ITIdeaSiteTag";

private const int UnexpectedType = 1;
private const int UnexpectedError = 2;
private readonly ProcessedItem processedItemHolder = new ProcessedItem
{
    ItemProperties = new List<AbstractProperty>()
};

public ProcessedItem ProcessItem(Item item)
{
    processedItemHolder.ErrorCode = 0;
    processedItemHolder.ItemProperties.Clear();
    try
    {
        // Iterate over each property received and locate the property we configured the system to send.
        foreach (var property in item.ItemProperties)
        {
            if (property.Name.Equals(SiteTagProperty, StringComparison.Ordinal))
            {
                var siteTag = property as Property<List<string>>;
                if (siteTag != null && siteTag.Value != null && siteTag.Value.Count > 0)
                {
                    string[] propValues = siteTag.Value.First().Split(';');
                    List<string> listpropValues = propValues.ToList();
                    Property<List<string>> newSiteTagProp = new Property<List<string>>();
                    newSiteTagProp.Name = SiteTagProperty;
                    newSiteTagProp.Value = listpropValues;
                    processedItemHolder.ItemProperties.Add(newSiteTagProp);
                }
            }
        }
    }
    catch (Exception)
    {
        processedItemHolder.ErrorCode = UnexpectedError;
    }
    return processedItemHolder;
}

The item.ItemProperties contain all the input properties received by the service. These input properties will be configured by PowerShell.
The code checks if the ITIdeaSiteTag property contains multiple terms, splits it and adds it to a list of property values and returns the changed value to the content processing component.

Configure the Search Service Application to use the Content Enrichment service by using PowerShell, for an example see this post. Don’t forget to set a meaningful trigger otherwise every item will be passed this service.

Run a full crawl.

The refinement panel now shows a nice set of single values, notice the presence of ‘site04|..’ here:

CE2_Enriched_ManagedProperty_In_RefinementPanel

When using the refinement panel in conjunction with a content search webpart, two sites will be displayed when selecting e.g. ‘site02|..’ as expected:

CE2_Enriched_ContentSearch


Summary

To make a multivalued propertybag a real multivalued managed property a custom content enrichment service can de developed to accomplish this.
After creating a multivalued managed property it can be used in e.g. a refinement panel.

The intention of this post was purely to demonstrate the technique, no changes has been made to make things look pretty :-)

Note

Only one custom content enrichment service can be bound to a Search Service Application.
If you want more properties to be processed by the service you have to configure the InputProperties, OutputProperties and don’t forget the Trigger of the EnterpriseSearchContentEnrichmentConfiguration object to handle them all.

Quick PowerShell Tips

$
0
0

Paste

In Command Prompt or PowerShell windows you can paste by right-clicking. But not always… Why?
Right-click the top bar and select properties.
QPT Properties
Select the Options tab and make sure the edit option ‘QuickEdit Mode’ is selected. Now the right-click paste is working.
QPT Properties QuickEdit Mode
Besides the right-click paste you’re getting now, also the instant ‘Mark’ is available. By left-clicking you can select text, press Enter or right-click and the selected text has been copied to the clipboard.

This functionality isn’t new, but very neat!

History

A known function is the up arrow key: with this command you can traverse through the commandline buffer and select one of the previous commands.
Another option is the F7 key (Alt-F7 to clear the history). It shows a menu of previously run commands!
QPT F7

This command history comes from the console-hosting application, not from PowerShell.

PowerShell maintains it’s own history and can be seen bij executing the following command
Get-History | Select -ExpandProperty CommandLine

When using the Get-History command and F7 in a SharePoint 2013 Management Shell you’ll notice the difference:
Get-History shows loading sharepoint.ps1 while the console history isn’t aware this command has even been executed.


QPT Up Arrow key vs F7

Output history

A tip to store the previous run commands:

Get-History | Select –Expand CommandLine | Out-File savemycommands.ps1

Collect signatures workflow – An error occurred signing the document

$
0
0

One of the out-of-the-box workflows in SharePoint is the Collect signatures workflow.

When you are assigned to a task from this workflow, you’ll receive an email with an ‘Open this task’ action button.
Collect signatures - open task Outlook

Click the button:
Collect signatures - open document

Select ‘Open Document’, Word is opened and on top the workflow task shows as notification.

Select ‘Open this Task’ and the following screen shows up:
Collect signatures - task

Optional add a comment in the ‘Comments’ field and select ‘Sign’.

The following message shows:

Collect signatures - error

‘An error occurred signing the document. The signature line may not be configured correctly or may have already been signed.’

This message occurs when
  • no Signature Line object is added to the document,
  • there are more people in the workflow than signature lines or
  • someone tries to sign a signature line which is already signed.

Add a Signature Line object to the document by selecting ‘Signature Line’ in the ‘Insert’ tab in Word or Excel. The following screen shows up:

Collect signatures - signature setup


Select ‘Ok’ and a Signature Line object is inserted in the document.

Collect signatures - signature line in Word

This signature line will be used in the workflow to be able to actually sign the document.

Summary

To use the Collect signature workflow an actual Signature line object has to be present in the document. Only Word and Excel documents can contain these kind of Signature line objects.
The sequence and number of persons assigned to the workflow have to agree the sequence and number of Signature line objects in the document.

In-place records overview

$
0
0

One of the nice features in SharePoint records management is the possibility to declare records in-place. Documents are archived in context of their creation environment. This is a huge advantage in comparison with the record center where all the documents are stored without any context.

When a document is declared as a record a field is filled with the date of declaration. This can be seen by declaring a record in-place and check out the fields available in de library. A field called ‘Declared record’ shows up. When this field is added to a view one can see when the record is declared.
In place archive - Declared record field in library view

Unfortunately there is no out-of-the-box functionality to find all declared records in a farm or online environment. But this can be created easily using search.

In Office 365 the crawled property ‘ows_q_DATE__vti_ItemDeclaredRecord’ is present and contains the declared record date. Also a managed property is created: vtiItemDeclaredRecordOWSDATE which is defined as a Text field and contains the textual representation of the date of the declared record. This property is not searchable, refinable nor sortable, but it is queryable and retrievable, so it can be used by search.

In the search center a new page is created named ‘Archive’.

To list all the declared records a query can be added to the search results webpart. Since the out-of-the-box managed property is defined as Text a query like vtiItemDeclaredRecordOWSDATE:’*2*’ can be added to search every record declared in this century.

In place archive - add owsdate to query

The next wanted functionality is of course to be able to refine the search results by date of declaration. Since a text property is used here, this is not going to work.
So we need another managed property to be able to use this field in the search center for our purpose: to be able to refine in-place declared records by declaration date.

In Office 365 there are a couple of predefined refinable date fields (RefinableDate00 up to RefinableDate19) and we need a mapping to the crawled property ‘ows__vti_ItemDeclaredRecord’ on one of these fields. Which one you pick doesn’t matter.

This managed property can be used to refine the search results by date of declared record like the ‘Modified’ field with slider and bar graph.

The result is an archive search results page as show below.
In place archive - search results

Summary

Search is a very powerful part of SharePoint. Also in the case of creating a search results page for archived documents including a refiner at declared record date.

List records about to expire

$
0
0

This post is written as a follow up and extension of my previous post In-place records overview.

Records management can be implemented in combination with information management policy settings. One of these settings is retention. With retention content can be managed and disposed by specifying one or more stages.

The picture below shows a retention policy where the document will be moved to the recycle bin after it’s declared as a record for 10 days. This is a quite short period of time, but convenient for demo purposes.
Records about to expire - stage properties
Retention policy added to a content type

When using records management with retention policies, where records are declared in-place, stored in a record center or a combination of both, it’s quite hard to list all records that will expire let’s say this month.
Once there is such an overview the documents listed can be checked and eventually owners can be contacted before they’ll get deleted.

One field is automatically added to the library when a document is declared as a record: ‘Declared Record’.
When a retention policy is defined at the used content type an additional field is added: ‘Expiration Date’. This field, in combination with search, can be used to display an overview.

In a library documents of this content type were created and the view was adjusted to show both fields ‘Declared Record’ and ‘Expiration Date’ as show below.
Records about to expire - documents
View with Declared Record and Expiration Date fields

With this basic setup in place, we’re almost there… :-)

In Office 365 there are a couple of predefined refinable date fields (RefinableDate00 up to RefinableDate19) and we need a mapping to the crawled property belonging to the Expiration Date: ‘ows__dlc_ExpireDate’ on one of these fields. Which one you pick doesn’t matter.
This managed property can be used in a Content Search web part by adding the following query to show records to be expired ‘this month’:
RefinableDatexx:”this month”
where xx is the number you used for the managed property name

Records about to expire - build query
Build the query

To show the Expiration Date in the results, the managed property can be used in the property mappings at the properties of the web part.
Eventually a refiner can be added by result type (Word, Excel, etc) or other refiners to be able to refine the results.

Summary

There are no out-of-the-box overviews for records about to expire in SharePoint (Online). Fortunately this can be created easily using a managed property and search.


Where and how to put Classification on a document

$
0
0

I find it always a nice discussion where and how to put ‘Classification’ ( a Private or Public document ) on a document and what this exactly means for the document and/or the user. It can involve permissions, but sometimes it’s no more than a metadata field, like Last Modified or Name, or a combination of both.

Metadata itself doesn’t imply anything in relation to permissions. It’s the location that’s in charge of the permissions (to prevent item level permissions) e.g. a folder or a library. That’s where the confusion starts…

Take a look at the pictures below.

Classification - library
View with folders

Classification - library no folders
View without folders

A map ‘Confidential’ exists with other permissions than the root folder. One document is stored in this folder. A metadata field Classification exists and is randomly :-) set to Private and Public to documents in the root folder and the Confidential folder. The field seems to be redundant, because it only confuses users about the classification and what this means for a particular document. This is strengthened when a document is moved from the root folder to the Confidential folder. Can a user be trusted to switch the metadata field to Private? Remember: people are lazy by nature… :-)

Metadata is quite handy for example when using refiners in the search center. But when permissions are used, are these refiners still handy or necessary? The search center shows only documents which are accessible to you…

Classification - refiner
Search center with Classification refiner

When the user needs to know if a document is Private or Public and enforced with permissions one can do something with icons to show the classification instead of using confusing metadata. Icons can be used in a document library using JSLink and/or in the search center formatting the search results by the display template used.

Classification - library icon
Icon used in library to show classification (no icon means Public, lock icon means Private)

Classification - search icon
Icon used in search center to show classification
(no icon means Public, lock icon means Private)

Summary

This post showed one of the examples to implement document classification. I’m sure you had a similar discussion about this or another field at your customer.

How did you solve it and why?

Office 365 Video REST API – Create a channel overview

$
0
0

Microsoft exposes almost everything through REST API’s these days, which is excellent!

Not only Mail, Contacts, Calendar and Files, but also Video. In this post I’m going to show you some simple steps to interact with Channels using the REST Video API. But first some basics.

Video Portal basics

The Video Portal exists of a video hub, channels and video’s.
The hub functions as a sort of root, which it isn’t hierarchically speaking. The hub shows all the channels, trending video’s and other stuff you can configure in the Portal Settings section to show eg video’s from a certain channel and some spotlight video’s.
Video - hub

From the hub a single channel can be accessed through the Channels overview. When a single channel is selected the button Channel Settings is available when you have enough permissions. Here items like channel name, color, permissions etc can be configured.
Video - channel settings

A nice feature is the link to Storage Metrics. It displays the allocation of quota within the site.
Video - storage metrics

Channel basics

The hub and channels are all separate site collections. The hub and the default Community channel are visible in the SharePoint admin center, including the storage used, storage limit, etc as shown in the picture below.
Video - admin center

User created channels, site collections, are hidden in de SharePoint admin center. These site collections are perfectly fine accessible by their url. For example a channel named MyChannel was created. The server relative url would then be /portals/MyChannel.

The site collection is used to store video’s, settings and permissions.

A library called Videos stores all the original video’s uploaded into the channel. Also the thumbnail generated after processing the video by Azure Media Services is stored in this list and other metadata about the video. A video is based on a content type called Cloud Video. Besides the ‘regular’  columns as Title and Description other columns are present:

  • Owner
  • People in Video
  • Categories – managed metadata, can be set to a term set of your choice.
  • Thumbnail preview
  • Length (seconds)
  • Frame width
  • Frame height

Since the video is stored in SharePoint the video file size limit is the same as SharePoint file size limit.

Another important list is the Channel Settings list. In this list the channel name, tile color and spotlight videos are stored.

Permissions are just some regular SharePoint groups. The link to the groups isn’t present from the Settings page, but it’s accessible: /_layouts/15/groups.aspx
Video - groups

The groups Creators, Contributors and Viewers are the groups meant in the channel settings accessible from the hub at the Permissions tab: Owners, Editors and Viewers.

Now you have a basic understanding of the hub and the channels, let’s do some code.

Some code

At the hub level a list of channels is available, but it’s only a list of the channel name and the color, no other information is shown here.

Let’s show the users in the permission groups set at the channels next to the channel so a more informative overview is created.

This is a simple example of using the Video REST API and the SharePoint REST API. The Video REST API is used to get information about the video portal and the channels, the SharePoint REST API is used to get the users of some groups.

First a request has to be created to the Video portal’s discovery endpoint to discover whether the video portal is set up and enabled and to get the URL of the video portal.

https://…sharepoint.com/_api/VideoService.Discover

The Video portal root url is used in subsequent calls.

There are two options to get a list of channels. /_api/VideoService/CanEditChannels can be used to get channels he user has Owner or Editor permissions and /_api/VideoService/Channels can be used to get channels the user can view.
Video - response calling channel

The picture above shows the response of the call.

These are the only calls needed to the Video REST API. To request the users in the specified groups the SharePoint REST API can be used like:

https://<channelurl>/_api/web/sitegroups/getbyname(‘<name of the group>’)/users

And the users in the group are returned.

Possible result can be like the image below.
Video - channel overview and users in groups

Summary

In this post the basics about the video portal and channels are explained.

The above overview was just a quick demo with a small amount of channels. Production code should probably contain code more based on search.

Create a document set using JSOM and REST

$
0
0

To create a document set in a document library its necessary to add a Document Set content type to the library. After doing this a document set can be created using various techniques. In this post I’ll show you how to do so using JSOM or REST.

JSOM

To use JSOM the appropriate references have to be added to the HTML, but the most important one is SP.DocumentManagement.js. Of course a nice UI can be set up to pass in values for necessary input parameters, but for demo purposes filled in variables are used as shown below.

var url = "";
var listTitle = "";
var docSetContentTypeID = "";
var docSetName = "";

var context = new SP.ClientContext(url);
var web = context.get_web();
var list = web.get_lists().getByTitle(listTitle);
context.load(list);

var parentFolder = list.get_rootFolder();
context.load(parentFolder);

var docSetContentType = context.get_site().get_rootWeb().get_contentTypes().getById(docSetContentTypeID);
context.load(docSetContentType);

context.executeQueryAsync(
  function () {
    SP.DocumentSet.DocumentSet.create(context, parentFolder, docSetName, docSetContentType.get_id());
    context.executeQueryAsync(
    function () {
      logtoconsole("document set created");
    },
    function (sender, args) {
      logtoconsole("document set error");
    }
    );
  }
);

That’s all there is!

REST

I found it more of a challenge using REST to add a document set to a library, because I couldn’t find any appropriate SharePoint 2013 REST endpoint to use.

I tried for example a POST to ‘/_api/web/folders’ with { ‘__metadata’: { ‘type’: ‘SP.Folder’ }, ‘ServerRelativeUrl’: ‘Documents/test1′ , ‘ContentTypeId’: ’0x0120D520009403DDAFA2D9F54E885F81B4DA488BA00101′}
The following message was returned as result:

‘The property ‘ContentTypeId’ does not exist on type ‘SP.Folder’. Make sure to only use property names that are defined by the type.’

So I wasn’t able to specify a content type id when adding a folder, assuming a document set is a special type of folder.

Another option could be trying to add an item using a POST method to ‘/_api/web/lists/getbytitle(‘” + listTitle + “‘)/items with  { ‘__metadata’: { ‘type’: ‘SP.Data.Gedeelde_x0020__x0020_documentenItem’ } , ‘ContentTypeId’: ’0x0120D520009403DDAFA2D9F54E885F81B4DA488BA00101′ };
The result was:

‘To add an item to a document library, use SPFileCollection.Add()’

The only way I could find was to use the good old (SP2010) listdata service…

$http({
  method: "POST",
  url: url + "/_vti_bin/listdata.svc/" + listTitle,
  data: JSON.stringify(docSetOptions),
  headers: {
    "Accept": "application/json;odata=verbose",
    "content-type": "application/json;odata=verbose",
    "X-RequestDigest": $('#__REQUESTDIGEST').val(),
    "Slug": _spPageContextInfo.siteServerRelativeUrl + "/" + url + docSetOptions.Path + "/" + docSetOptions.Title + "|" + docSetOptions.ContentTypeId,
  }
}).success(function (data, status, headers, config) {
  logtoconsole("document set created");
}).error(function (data, status, headers, config) {
  logtoconsole("document set error");
});


With docsetOptions declared like:
var docSetOptions = {
‘Title’: myTitle,
‘Path’: ‘/Documents’,
‘ContentTypeId’: contentTypeId,
‘ContentType’: contentType};

Summary

Creating a document set using CSOM or REST can be done, sometimes with a nice challenge!

Setting default value at library using REST

$
0
0

A nice feature available at document library level is to set a default value on a field.
This can be done in the UI by navigating to the document library settings and select ‘Column default value settings’. A default value can be set at a specific folder in the library or at the root folder of the document library as can be seen in the picture below.


When a default value is set there are two things that happen under the SharePoint hood:

  1. A file called client_LocationBasedDefaults.html is created in the Forms folder of the library
  2. The event receiver ‘LocationBasedMetadataDefaultsReceiver ItemAdded’ is attached to the library

The file contains xml which stores the default value set at the field level. An example of the file contents:

<MetadataDefaults><a href=”/teams/testteamsite/TestDefaultValue/DocLib”><DefaultValue FieldName=”MyColumn”>123</DefaultValue></a></MetadataDefaults>

Now I want to accomplish the same thing using REST.
First the file with xml is created and uploaded to the appropriate location using the following piece of code.

var fileCollectionEndpoint = String.format(   "{0}/_api/web/getfolderbyserverrelativeurl('{1}/{2}/forms')/files"
+ "/add(url='{3}',overwrite=true)",
_spPageContextInfo.webServerRelativeUrl,
list, "client_LocationBasedDefaults.html");

$http({
method: "POST",
url: fileCollectionEndpoint,
data: "<MetadataDefaults><a href=\"" + _spPageContextInfo.webServerRelativeUrl
+ "/" + list + "\"><DefaultValue FieldName=\"MyColumn\">MyValue</DefaultValue></a></MetadataDefaults>",
headers: {
"Accept": "application/json;odata=verbose",
"content-type": "application/json;odata=verbose",
"X-RequestDigest": $('#__REQUESTDIGEST').val(),
}
} 

In the UI the result is visible immediately and the default value of ‘MyColumn’ is set to ‘MyValue’.

DefaultValue - code

So it seems to do the trick, but since the event receiver is missing, the default value won’t be set when adding a document to the library…

Unfortunately I wasn’t able to add an event receiver using REST…

Besides setting a default value by using the option above, there is another option: set a default value at field level. Probably less fancy, because it’s not possible to set a default value at folder level, but for now an acceptable solution.
DefaultValue - field default value

This can be accomplished by REST:


$http({
    method: "POST",
    url: rootUrl + "/" + url +
"/_api/web/lists/getbytitle('" + listTitle +
"')/fields/getbytitle('" + columnTitle + "')",
    data: "{ '__metadata': { 'type':
'SP.Field' }, 'DefaultValue': '" + itemValue.toString() + "' }",
    headers: {
        "Accept":"application/json;odata=verbose",
        "X-HTTP-Method":"MERGE",
        "content-type":"application/json;odata=verbose",
        "X-RequestDigest":$('#__REQUESTDIGEST').val(),
        "If-Match": "*",
    }
}

Summary

Setting a default value at library level isn’t that easy using REST, because it’s impossible to add an event receiver to the list. At this particular scenario another option is viable: set a default value at field level. This is an easy step to accomplish using REST.

GetTaxonomySession – cannot convert argument context

$
0
0

The other day I was trying to add terms to the site collection level term group using PowerShell CSOM when an issue arose:

Cannot convert argument “context”, with value: “Microsoft.SharePoint.Client.ClientContext”, for “GetTaxonomySession” to type “Microsoft.SharePoint.Client.ClientRuntimeContext”

Let me explain the situation.
There is an on-premises SP2013 environment where to connect to with the OfficeDev PnP PowerShell command Connect-SPOnline:

Connect-SPOnline -Url <site collection url> -CurrentCredentials

To get to the site collection term group the following code was used to get a taxonomysession and to get to the site collection term store:

$context = Get-SPOContext
$MMS = [Microsoft.SharePoint.Client.Taxonomy.TaxonomySession]::GetTaxonomySession($context)
$context.Load($MMS)
$context.ExecuteQuery()
$termStore = $MMS.GetDefaultSiteCollectionTermStore()
$context.Load($termStore)
$context.ExecuteQuery()

When the line with ‘GetTaxonomySession’ got executed the exception

Cannot convert argument “context”, with value: “Microsoft.SharePoint.Client.ClientContext”, for “GetTaxonomySession” to type “Microsoft.SharePoint.Client.ClientRuntimeContext”

was thrown.

After some digging around the way to connect to the environment and retrieved a context was changed to:

$clientContext = New-Object Microsoft.SharePoint.Client.ClientContext($url)
$credentials = New-Object Microsoft.SharePoint.Client.SharePointOnlineCredentials($username, $securePassword)
$clientContext.Credentials = $credentials

After successfully connected to the environment the code to get a taxonomysession and to get to the site collection term store was executed successfully.

Another issue arose when the code was executed to another environment which uses ADFS to connect. The way to connect to the environment doesn’t work when using ADFS (Connect-SPOnline does), because it needs network credentials. Another difference between the environments is that I’m a site collection administrator at this environment and the first environment is my development (with all permissions) environment… So probably it will turn out to be a permission issue…

Back to the initial issue: how to get the site collection term group.

Appearently GetTaxonomySession($context) does need more permissions than I have at the specific environment. Even in the development environment when connection with Connect-SPOnline? Strange…

What other options are there to use?

Get-SPOTaxonomySession

The code was changed to:

$context = Get-SPOContext
$session = Get-SPOTaxonomySession
$termStore = $session.GetDefaultSiteCollectionTermStore()
#get the groups
$context.Load($termStore.Groups)
$context.ExecuteQuery()
[\powershell]

And the exception was gone in both environments while connecting with Connect-SPOnline…

When requesting $termStore.Groups.Count the result is the total number of groups in the term store in the development environment. In the other environment one site collection group and the global groups are returned as expected.

Summary

The call [Microsoft.SharePoint.Client.Taxonomy.TaxonomySession]::GetTaxonomySession throws the exception

Cannot convert argument “context”, with value: “Microsoft.SharePoint.Client.ClientContext”, for “GetTaxonomySession” to type “Microsoft.SharePoint.Client.ClientRuntimeContext”

when using it in the above context. The issue can be solved by using the statement Get-SPOTaxonomySession from the OfficeDevPnP PowerShell library in combination with the Connect-SPOnline command to connect to the environment.

Update shared fields in a document set

$
0
0

To update shared fields in a document set using Office 365 Dev PnP PowerShell Cmdlets the following cmdlet can be used:

Set-SPODocumentSetField -Field "fieldname" -DocumentSet "documentsetname" -SetSharedField

This cmdlet sets the field from the available content types to the document set.
from the available content types
Besides that the functionality isn’t available in the UI, the functionality seems a little bit odd, especially when multiple content types are available in the document set. Why share fields at the level of ‘available content types’?
It seems more plausible to me to make a shared field available at document set level like the UI suggests and explains:

Select which column values for the Document Set should be automatically synchronized to all documents contained in the set.

Enough of the confusion…
In my case I had a field at document set level which I wanted to add to the shared fields collection.

When trying to use the Office 365 Dev PnP PowerShell cmdlet at that level a warning was shown:

Warning: Field not present in document set allowed content types

Luckily PowerShell and CSOM can be used to accomplish this:

$fieldName = "MyText" # field name at document set level
$ctName = "MyDocSet" # document set name

$ctx = Get-SPOContext
$docset = Get-SPODocumentSetTemplate -Identity $ctName

$field = $ctx.Web.Fields.GetByInternalNameOrTitle($fieldName)
$ctx.Load($field)

if($field)
{
 $docset.SharedFields.Add($field)
 $docset.Update($true)
 Execute-SPOQuery
}

DocSet_MyDocSet

Extensibility handler for OfficeDev PnP provisioning framework

$
0
0

The PnP Provisioning framework can be used to remotely extract and provision standardized sites based on templates. This is a typical requirement for enterprises and we have classically used technologies like site definitions, site templates or web templates to achieve this. Releases of the framework are made recently, but sometimes functionality is desired which the framework doesn’t provide (yet).

To extend the framework yourself Extensibility Handlers can be implemented.
An extensibility handler can be executed when provisioning and extracting a site as template.

To immediately dive into the details, let’s start Visual Studio and

  1. Start a new class library project
  2. Add a references to Microsoft.SharePoint.Client, Microsoft.Client.Runtime and OfficeDevPnp.Core
  3. Add a class and implement interface IProvisioningExtensibilityHandler

At this point the code looks like this:

public class DoSomethingHandler : IProvisioningExtensibilityHandler
{
  public ProvisioningTemplate Extract(ClientContext ctx, ProvisioningTemplate template,
   ProvisioningTemplateCreationInformation creationInformation,
   PnPMonitoredScope scope, string configurationData)
  {
    throw new NotImplementedException();
  }

  public IEnumerable<TokenDefinition> GetTokens(ClientContext ctx,
   ProvisioningTemplate template, string configurationData)
  {
    throw new NotImplementedException();
  }

  public void Provision(ClientContext ctx, ProvisioningTemplate template,
   ProvisioningTemplateApplyingInformation applyingInformation,
   TokenParser tokenParser, PnPMonitoredScope scope, string configurationData)
  {
    throw new NotImplementedException();
  }
}

When a site is exported the Extract method is called and when a site is created the Provision method is called.
The GetTokens method provides a way to use your own token definitions.

To use the extensibility provider in the template xml a providers section has to be added:

<pnp:Providers>
 <pnp:Provider Enabled="true"
   HandlerType="<namespace + classname, <assembly name>, <version>, <culture>, <publickeytoken>">
 <pnp:Configuration>
 <valid_xml xmlns="http://schemas.itidea.com/extensibilityproviders">true</valid_xml>
 </pnp:Configuration>
 </pnp:Provider>
</pnp:Providers>

The Provider element has two attributes:

  1. Enabled, to enable or (temporarily) disable the handler
  2. HandlerType, which describes where the handler is located.

Inside the pnp:Configuration element anything can be placed, as long it’s valid xml.

The Provisioning engine has to be able to find the assembly referenced in the HandlerType attribute. To accomplish this the PowerShell commandlet Add-Type can be used.
To use the (right now not so useful) handler three lines of PowerShell are sufficient:

Connect-SPOnline -Url <url>
Add-Type -Path C:\_Tools\ITIdea.PnPExtensions\bin\Debug\ITIdea.PnPExtensions.dll
Apply-SPOProvisioningTemplate -Path C:\_Tools\ITIdea.PnPExtensions\Template\template.xml

Ofcourse this returns a NotImplementedException, because the methods aren’t implemented.

Attach the powershell process to debug the handler in Visual Studio.
The xml defined inside the handler is captured in a string called configurationData, which can be serialized when needed.
PnP Extensibility Handler - configurationdata

Token definition

The Provisioning Framework has lots of token definitions implemented, like {sitename}, {roledefinition:Reader}, {sitecollectiontermstoreid} and much more.
PnP Extensibility Handler - list of tokendefinitions

When a custom token is needed it can be implemented by creating a class derived from TokenDefinition and override the method GetReplaceValue.
Suppose the title of the rootweb of the site collection is needed in a subsite.

public class SiteCollectionNameToken : TokenDefinition
{
  public SiteCollectionNameToken(Web web)
   : base(web, "{sitecollectionname}")
  {
  }

  public override string GetReplaceValue()
  {
    if (CacheValue == null)
    {
      this.Web.EnsureProperty(w => w.Url);
      using (ClientContext context = this.Web.Context.Clone(this.Web.Url))
      {
        var site = context.Site;
        context.Load(site, s => s.RootWeb.Title);
        context.ExecuteQueryRetry();
        CacheValue = context.Site.RootWeb.Title;
      }
    }
    return CacheValue;
  }
}

The token which can be used in the template xml is listed in the constructor. In this case {sitecollectionname} can be used.

This token will be replaced by the actual value in the method GetReplaceValue.
Once the tokendefinition is in place it can be used in the GetTokens method in the extensibility handler.

public IEnumerable<TokenDefinition> GetTokens(ClientContext ctx,
 ProvisioningTemplate template, string configurationData)
{
  var customTokens = new List<TokenDefinition>();
  customTokens.Add(new SiteCollectionNameToken(ctx.Web));
  return customTokens;
}

And it can be used in the xml which describes the template.

<pnp:Providers>
  <pnp:Provider Enabled="true"
   HandlerType="ITIdea.PnPExtensions.Extensions.DoSomethingHandler, ITIdea.PnPExtensions,
   Version=1.0.0.0, Culture=neutral, PublicKeyToken=null">
    <pnp:Configuration>
      <valid_xml xmlns="http://schemas.itidea.com/extensibilityproviders">{sitecollectionname}</valid_xml>
    </pnp:Configuration>
  </pnp:Provider>
</pnp:Providers>

To show the output the Provision method writes the configurationData to the console:

PnP Extensibility Handler - replaced token

As can be seen the token is replaced by its value.

Provision

Suppose permissions are inherited at subsite level. The permissions of a list at subsite level are broken and some sitegroups have to be deleted from this list by the provisioning framework.
The title of the rootweb of the site collection is ‘Dev Anita’ in this example, so the sitegroups are called ‘Dev Anita Members’, ‘Dev Anita Owners’ and ‘Dev Anita Visitors’.
The token defined earlier gets the title of the rootweb of the site collection, convenient…

To be able to delete groups from a list a couple of things are needed, like the list, the group names and roledefinitions. I came up with the following XML:

<pnp:Providers>
  <pnp:Provider Enabled="true"
   HandlerType="ITIdea.PnPExtensions.Extensions.DoSomethingHandler, ITIdea.PnPExtensions,
   Version=1.0.0.0, Culture=neutral, PublicKeyToken=null">
    <pnp:Configuration>
      <List Name="Documents" xmlns="http://schemas.itidea.com/extensibilityproviders">
        <SiteGroups>
          <SiteGroup Name="Approvers" RoleDefinitionName="Approve"/>
          <SiteGroup Name="{sitecollectionname} Members" RoleDefinitionName="{roledefinition:Editor}"/>
        </SiteGroups>
      </List>
    </pnp:Configuration>
  </pnp:Provider>
</pnp:Providers>

{roledefinition:Editor} is a token which is implemented by the OfficeDev PnP provisioning framework.
Inside the Provision method the xml configurationdata is received as a string and written to the console for convenience:
PnP Extensibility Handler - serialized xml provision

To be able to process the XML nicely it’s serialized to a custom object ‘MyList’ which consists of the items the XML does.

The code to remove the roledefinition from the list is easy:


public void Provision(ClientContext ctx, ProvisioningTemplate template,
 ProvisioningTemplateApplyingInformation applyingInformation,
 TokenParser tokenParser, PnPMonitoredScope scope, string configurationData)
{
  Console.WriteLine(configurationData);

  var reader = new StringReader(configurationData);
  var serializer = new XmlSerializer(typeof(MyList));
  var listConfig = (MyList)serializer.Deserialize(reader);

  List theList = ctx.Web.Lists.GetByTitle(listConfig.Name);
  ctx.Load(theList);
  ctx.ExecuteQueryRetry();

  SiteGroups groups = listConfig.SiteGroups;
  foreach (var group in groups.Groups)
  {
    theList.RemovePermissionLevelFromGroup(group.Name, group.RoleDefinitionName);
  }

  theList.Update();
}

Summary

The OfficeDev PnP framework provides a lot of functionality to remotely extract and provision sites. To implement specific functionality an extensibility handler can be developed using CSOM.
Be aware that handlers are always executed last irrespectively their location in the xml file.


XSLTListViewWebpart property XMLDefinition does work

$
0
0

Adding a list as web part to a page results in an XSLTListViewWebpart.

1-xsltlistviewwebpart-initial-view

Figure 1 Added a list to a page

This results in a hidden view configured with the query and field references used. The accompanying view xml is shown in figure 3. Figure 2 displays the number of views before adding the web part to the page.

2-xsltlistviewwebpart-initial-listviews

Figure 2 Listviews before adding the list to a page

3-xsltlistviewwebpart-hidden-view-xml

Figure 3 Hidden view configuration

Configuring the fields shown in the web part results in a replaced hidden view.
The view configured:

4-xsltlistviewwebpart-configured-view

Figure 4 Configured view

And the accompanying xml shown in Figure 5.

5-xsltlistviewwebpart-hidden-view-xml-new

Figure 5 Hidden view xml

When this web part is exported to a web part file the view configuration is stored in an xml property called XmlDefinition.

<property name="XmlDefinition" type="string">
&lt;View Name="{4A2EFF1A-3B9D-4666-BED2-746669E3F037}" MobileView="TRUE" Type="HTML"
Hidden="TRUE" DisplayName="" Url="/teams/testteamsite/TestDefaultValue/SitePages/Home.aspx"
Level="1" BaseViewID="1" ContentTypeID="0x" ImageUrl="/_layouts/15/images/dlicon.png?rev=44" &gt;&lt;
Query&gt;&lt;OrderBy&gt;&lt;FieldRef Name="FileLeafRef"/&gt;&lt;/OrderBy&gt;&lt;/Query&gt;&lt;
ViewFields&gt;&lt;FieldRef Name="DocIcon"/&gt;&lt;FieldRef Name="LinkFilename"/&gt;&lt;
FieldRef Name="Modified"/&gt;&lt;FieldRef Name="_UIVersionString"/&gt;&lt;/
ViewFields&gt;&lt;RowLimit Paged="TRUE"&gt;30&lt;/RowLimit&gt;&lt;Aggregations Value="Off"/&gt;&lt;
JSLink&gt;clienttemplates.js&lt;/JSLink&gt;&lt;XslLink Default="TRUE"&gt;main.xsl&lt;/XslLink&gt;&lt;
Toolbar Type="Standard"/&gt;&lt;/View&gt;
</property>

Importing this web part through the UI or using SharePoint PnP (which uses CSOM in their modules) in the same web on another page results in a fully configured web part as exported and as expected, shown in figure 4.
SharePoint PnP is used here because the provisioning of pages has to be done most of the time in projects in a repeatable way.

Use in other web

Specific list references have to be removed (ListId property) or changed (ListUrl and ListName properties) when importing this web part in another web.
After modifying the properties of the web part file and import it on another web where the list specified in the xml exists, results in a default view as in Figure 1 using SharePoint PnP.

The XmlDefinition property seems to be ignored, because the Version column isn’t visible.

6-xsltlistviewwebpart-xmldefinition-seems-to-be-ignored

Figure 6 XmlDefinition seens to be ignored, Version column not visible

It seems to be ignored, because the exported data in the property isn’t valid.

When there’s xml in a CDATA tag like shown in the xml snippet below, the configuration will be applied.


<webParts>
<webPart xmlns="<a href="http://schemas.microsoft.com/WebPart/v3">http://schemas.microsoft.com/WebPart/v3</a>">
<metaData>
<type name="Microsoft.SharePoint.WebPartPages.XsltListViewWebPart, Microsoft.SharePoint, Version=15.0.0.0,
  Culture=neutral, PublicKeyToken=71e9bce111e9429c" />
<importErrorMessage>Cannot import this Web Part.</importErrorMessage>
</metaData>
<data>
<properties>
<property name="Title" type="string">Test</property>
<property name="ListName" type="string">DemoDocs</property>
<property name="ListUrl" type="string">DemoDocs</property>
<property name="XmlDefinition" type="string"><![CDATA[
<View Type="HTML" Name="DoesntMatter" BaseViewID="1">
<Query>
<GroupBy Collapse="TRUE" GroupLimit="30">
<FieldRef Name="Author"/>
</GroupBy>
<OrderBy>
<FieldRef Name="Created" Ascending="FALSE"/>
<FieldRef Name="Title"/>
</OrderBy>
</Query>
<ViewFields>
<FieldRef Name="ID"/>
<FieldRef Name="DocIcon"/>
<FieldRef Name="LinkFilename"/>
<FieldRef Name="Editor"/>
<FieldRef Name="Created"/>
<FieldRef Name="FileSizeDisplay"/>
</ViewFields>
<RowLimit Paged="TRUE">9</RowLimit>
<Aggregations Value="On">
<FieldRef Name="DocIcon" Type="COUNT"/>
</Aggregations>
<JSLink>clienttemplates.js</JSLink>
<Toolbar Type="Standard"/>
</View>]]></property>
</properties>
</data>
</webPart>
</webParts>

The result at the page:

7-xsltlistviewwebpart-configured-view-at-other-site

Figure 7 Configured view at other site

Even the Toolbar set to None works:

8-xsltlistviewwebpart-configured-view-at-other-site-even-toolbar-none-works

Figure 8: Toolbar None works as expected


9-xsltlistviewwebpart-view-xml-at-other-site-even-toolbar-none-works

Figure 9 Configured view xml

Summary

When an XSLTListViewWebpart is exported the XmlDefinition property contains xml which can’t be used when the webpart is imported in another site using client side object model. Use the CDATA tag as shown en it all works.

Where is the Edit dropdown in the search hover panel?

$
0
0

A recent assignment was to adjust the hover panel of search results. At the bottom, the footer, a menu item was wished for.

The displaytemplate involved here was Item_CommonHoverPanel_Actions. This displaytemplate is responsible for displaying the menu items at the bottom of the hover.

On an on prem environment the footer consists of an Edit menu item which consists of a dropdown with items like Download and Open in browser, and Follow, Send and View in library menu items as can be seen in figure 1.

search_item_commonhoverpanel_actions

Figure 1 – out of the box footer menu


To add a menu item at the bottom a copy of this file was made, MyItem_CommonHoverPanel_Actions, without adding the custom link for now, just to make sure everything works without customizing. In an appropriate display template a link to this new actions file can be set/overridden by using the HP.CommonActions property:

if (typeof HP === "undefined") {
SP.SOD.executeFunc("searchui.js", "HP_initialize", function () {
HP.CommonActions = "~sitecollection/_catalogs/masterpage/Search/Display Templates/Custom Displaytemplates/MyItem_CommonHoverPanel_Actions.js";
});
}

The changed displaytemplate is set to the Word resulttype and after refreshing the search results page the footer from MyItem_CommonHoverPanel_Actions can be seen in the hover panel, but… the edit dropdown is gone! Without even changing anything in the copied file!

search_myitem_commonhoverpanel_actions

Figure 2 – copy of the out of the box footer menu

The html generates an accompanying js file where the rendering of the dropdown is present at the original Item_CommonHoverPanel_Actions, but not at MyItem_CommonHoverPanel_Actions.

It seems this file generates different js once it’s copied, renamed and/or replaced without making any adjustment in the file itself!

Fortunately there’s another way to adjust the menu items in the footer AND keep the Edit dropdown.

An item template loads a specific hoverpanel. In this file calls to render the header, body and footer are made. The rendering of the footer loads the Item_CommonHoverPanel_Actions, which we’re not going to touch.

<div id="_#= $htmlEncode(id + HP.ids.actions) =#_" class="ms-srch-hover-actions">
_#= ctx.RenderFooter(ctx) =#_
</div>

A new menu item can be rendered before or after the out of the box footer.

I was unable to reproduce this behavior in an online environment. Online the edit dropdown isn’t shown (or rendered in the accompanying js file) at all.

How to create cascading drop downs using PowerApps

$
0
0

In SharePoint Online an app can be easily created using PowerApps to manage data. In this post I want to show you how to create cascading drop downs in an app and save the data back to SharePoint.

Start with three lists:

  1. Location list – location
    1-powerapps-cascading-dropdown-location-list
    Figure 1 – contents of Location list
  2. Training list – training name, lookup to location, price
    2-powerapps-cascading-dropdown-training-list
    Figure 2 – Contents of Training list
  3. Schedule list – lookup to location and training; schedule date
    No content yet.

Purpose

The purpose is to create a screen in the PowerApps app to select a Location and after the selection the items shown in the Training drop down will be narrowed to the trainings defined at the specified location in the Training list. To fulfill the schedule a date can be filled and the item can be saved to the list in SharePoint.

Create an app

From the Schedule list in SharePoint create a new PowerApp.
3-powerapps-cascading-dropdown-create-an-app
Figure 3 – create an app

Give the app a name and select ‘Create’.
4-powerapps-cascading-dropdown-name-the-app
Figure 4 – name the app

PowerApps is building the app out of the box with three screens: browse, detail and edit. The app is now fully functional and can be tested by selecting the Preview button (Play) in the top right of the screen.
5-powerapps-cascading-dropdown-preview-button
Figure 5 – the Preview button

The app shows no data, because there is no data in the Schedule list.
6-powerapps-cascading-dropdown-browse-screen
Figure 6 – browse screen

The Plus sign can be selected to navigate to the EditScreen in ‘New Item’ mode and a new item can be added to the list.
7-powerapps-cascading-dropdown-select-a-training
Figure 7 – select a Training

After selecting a Location all items in the Training list are displayed to select from. Select one and fill in a date and the item can be saved to SharePoint.
8-powerapps-cascading-dropdown-save-to-sharepoint
Figure 8 – item saved to SharePoint

This is what you get in the out of the box PowerApp created from the Schedule list:
a functional app bound to the data source selected from where the app was created in SharePoint.

Cascading drop downs

To create the cascading drop downs functionality the approach is a bit different. The Schedule list has no knowledge of what Training is given in what Location. The Training list is. The Training list doesn’t has to be aware of all Locations. The Locations list is.

The easiest approach is to create a new Form screen from the Insert tab, New Screen button.
9-powerapps-cascading-dropdown-new-form-screen
Figure 9 – new form screen

This screen consists of an EditForm and some controls, like the icons left and right at the top, the title label and the rectangular blue bar at the top.
10-powerapps-cascading-dropdown-contents-of-a-screen
Figure 10 – Contents of a screen

Controls have to be added to the screen (not the edit form! Make this control smaller if there isn’t any room left on the screen) to be able to select a Location and a Training by selecting Controls, Drop down from the Insert tab.

The drop downs have to be connected to two different data sources:
The Location drop down has to be bound to the Location list.
The Training drop down has to be bound to the Training list.

To do so select Data source from the View tab, connect to the appropriate SharePoint sites and add the two lists mentioned.
11-powerapps-cascading-dropdown-add-data-sources
Figure 11 – add data sources

The ‘_1’ is added because the name is already been used by the ootb PowerApp created.

To bind the Location drop down to the appropriate data source you have to select the drop down, select the property ‘Items’ and put in the value ‘Location_1’. The drop down is populated right away.
12-powerapps-cascading-dropdown-bind-dropdown-data-source
Figure 12 – bind a drop down to a data source

To create the cascading functionality the binding of the Training drop down will be dependent of the selection of the Location drop down.
The ‘Items’ property has to Filter the Training_1 data source where the selected Location in the drop down is the same as the Location lookup value in the Training_1 data source (=the Training list in SharePoint). The formula has to be:

Filter(Training_1,LocationLookup.Id = DropdownLocation.Selected.ID)

13-powerapps-cascading-dropdown-cascading-dropdown
Figure 13 – cascading drop down

Hit the Preview button (Play) in the top right of the screen to see this working in the browser, but it works in design mode already.
14-powerapps-cascading-dropdown-select-location-training
Figure 14 – select a location and see the training items listed
15-powerapps-cascading-dropdown-select-other-location-training
Figure 15 – select another location and see the training items listed for that specific location

All right, the cascading drop downs are working!

Last things to do are:
to add the Schedule date field and
save it all back to SharePoint.

And this is why I choose a new Form screen in the beginning, we’re going to use this now to make the saving back to SharePoint work. Of course a new Form can be added to a screen all the time.
As the form displays it isn’t connected to any data yet.
16-powerapps-cascading-dropdown-form-not-connected
Figure 16 – form not connected to any data

Since the Schedule list was already added as a data source, the form can connect to it by setting the ‘DataSource’ property to ‘Schedule’.
In the right pane ‘Form customization’ the layout and fields to show in the form can be chosen.
17-powerapps-cascading-dropdown-form-customization
Figure 17 – Form customization

To save the data back to SharePoint we’re going to set the Location and Training values in the EditForm to the same values as the cascading drop downs at the top of the screen have.
To do so select the Location data card in the Form and update the ‘Default’ property to

{‘@odata.type’ : “#Microsoft.Azure.Connectors.SharePoint.SPListExpandedReference”,
Id:DropdownLocation.Selected.ID,
Value:DropdownLocation.Selected.Title
}

For choice and lookup fields this is the way to save the field back to SharePoint.
@odata.type : has to have value #Microsoft.Azure.Connectors.SharePoint.SPListExpandedReference
Id : for lookup it’s the column id in the list
Value : the value of the field shown in the lookup

As you may notice you can’t update this property…
Therefor you have to unlock the data card by selecting the icon or text ‘Unlock to change properties’.
18-powerapps-cascading-dropdown-unlock-data-card
Figure 18 – unlock the data card

Now update the Default property.
If you did it right the value in the drop down in the Form updates immediately.
Do the same for the Training field.

Then the controls in the EditForm can be hidden to show only the ScheduleDate field and that’s it!
Hit the Preview button again, select a Location, Training, fill in a ScheduleDate and press the ‘Submit item’ button at the top right of the screen.
If you don’t see the ScheduleDate field set the Form in New mode, it probably is in Edit mode now.
19-powerapps-cascading-dropdown-schedule-list-update-from-powerapp
Figure 19 – Schedule list update from PowerApp

Summary

In this post I showed you how to create cascading drop downs and how to save this back to SharePoint. It contains a few caveats, but it’s quite doable.

SPFx Field Customizer Extension – blur field

$
0
0

To extend the SharePoint user experience with modern pages en libraries the SharePoint Framework Extensions can be used. Currently three new extension types are available:

  1. ApplicationCustomizers – Adds scripts to the page, as well as access well-known HTML element placeholders and extend them with custom renderings.
  2. FieldCustomizers – Provides modified views to data for fields within a list.
  3. CommandSets – Extends the SharePoint command surfaces to add new actions, and provides client-side code that you can use to implement behaviors.

SharePoint Framework Extensions RC0 now available

Recently I tried to create a very simple field customizer extension where contents of a field can be blurred. This is like the example shown in the Build 2017 video ‘Create the modern workplace with the SharePoint Framework‘, only much, much simpler!

The result can look like the figure below.
1-field-extension-blur-blurred-field-value

Figure 1 – Blurred field value

When hovering over the content of the field is shown.
2-field-extension-blur-hover-field-value

Figure 2 – At hover the field value is shown

The blur is set to a random field here. The functionality has probably more value to a field (not) showing a social security number or a phone number.

To implement this functionality three things has to be done:

  1. Generate a field customizer extension project from the latest SharePoint Framework Yeoman generator.
  2. Blur the field value and show the value at hover. This is done purely in css.
  3. Adjust the onRenderCell function to implement the blur on the field value and show the value on hover.

Generate a field customizer extension

There is extensive documentation available on how to create an extension project, coding the field customizer and debugging the field customizer using gulp serve and query string parameters. To avoid duplicate content please read that documentation and come back here to proceed.
3-field-extension-blur-project-settings
Figure 3 – Settings used to generate a field customizer extension

Test the field customizer without making any changes by using ‘gulp serve’ and adding
?loadSPFX=true&debugManifestsFile=https://localhost:4321/temp/manifests.js&fieldCustomizers={“Status”:{“id”:”365c26e5-f431-4145-a322-dddc9c94c367″}}
To your SharePoint list url, where specific items for this project are displayed in the last part:

fieldCustomizers={“Status”:{“id”:”365c26e5-f431-4145-a322-dddc9c94c367″}}

Id is the guid of the field customizer extension associated with this field and can be found in the customizer’s manifest file.

Status is the internal field name which should have its rendering controlled by the field customizer. Using the ‘TestFieldCustomizer’ list shown above you can easily use the ‘Percent‘ column to have its rendering controlled by the field customizer, it doesn’t really matter.

Note: when using the Title column the field value is set to ‘undefined’, because this field is ‘linked to item with edit menu’ and the html is slightly different for that. When another field of type Single line of text is added, the rendering is as expected using the field customizer.
4-field-extension-blur-field-value-undefined

Figure 4 – field values set to ‘undefined’

5-field-extension-blur-field-value-single-line-of-text

Figure 5 – Field type ‘Single line of text’

Blur the field value and show the value at hover

To standard blur the field value and show it at hover, this is what is needed in HelloWorldFieldCustomizer.module.scss:

.HelloWorld {

 .blurredCell {

  background-color: '#e5e5e5';

  display: 'inline-block';

  filter:blur(2.5px);

  margin-left: 3px;

 }

 .blurredCell:hover {

  filter:none;

 }

}

Adjust the onRenderCell function

To actually implement the functionality the onRenderCell function has to look like this:

@override
public onRenderCell(event: IFieldCustomizerCellEventParameters): void {
  event.domElement.classList.add(styles.HelloWorld);
  event.domElement.innerHTML = `
    &lt;div class='${styles.blurredCell}'&gt;
     ${event.fieldValue} &lt;/div&gt;
    `; 
}

Where styles.HelloWorld, the root, is applied, whereas .blurredCell is the standard class at a field value. The hover action sets the filter to none, what makes the field value visible to the user.

Playing with the debug url can render this at a different field:

?loadSPFX=true&debugManifestsFile=https://localhost:4321/temp/manifests.js&fieldCustomizers={“Percent“:{“id”:”365c26e5-f431-4145-a322-dddc9c94c367″}}

This will look like figure 1 and 2, or

?loadSPFX=true&debugManifestsFile=https://localhost:4321/temp/manifests.js&fieldCustomizers={“LikeTitle“:{“id”:”365c26e5-f431-4145-a322-dddc9c94c367″}}

That looks like figure 6.
6-field-extension-blur-implemented-blur-field-customizer-extension
Figure 6 – Implemented blur field customizer extension

Summary

This post showed a really simple example on how to implement a field customizer extension.
For now it only works in read mode in a list view, not in the details pane of an item, nor in the DispForm.

There is a catch

Sometimes when navigating away from the debug url, eg navigating to /Lists/TestFieldCustomizer/AllItems.aspx in this example, the ‘Allow debug scripts?’ screen is still shown. This will happen because there are references to debug files and cookies which can be removed by adding

?reset=true

to the url for just one time. Then all references are cleanup and you’re good to go.

How to reference a file in Azure function? C# script function vs C# function

$
0
0

To explain in detail how to reference a file in an Azure function some background information on the basics of Azure functions is necessary. To complete the story it will all be explained for C# script based function as well as C# compiled functions.

Azure functions

Azure functions can be built in the Azure portal, C# script based, or by using Visual Studio by using the Azure Function Tools for Visual Studio 2017 extension.

The Azure function tools provides a set of benefits:

  • Functions can be edited,  built and run from your local development computer
  • Visual Studio can be used for development
  • The Azure Functions project can be published directly to Azure
  • Pre-compiled C# functions are deployed instead of C# script based functions which benefit from a performance perspective

Let’s take a look at some practical differences for both options.

Both are examples of a simple C# HttpTrigger.

Method signatures

C# function
[FunctionName("Function1")]
public static async Task<HttpResponseMessage> Run([HttpTrigger(AuthorizationLevel.Function, "get", "post", Route = null)]HttpRequestMessage req, TraceWriter log)
C# script function
 public static async Task<HttpResponseMessage> Run(HttpRequestMessage req, TraceWriter log)
 

It can be seen that the C# function uses attributes where the C# script function uses the settings which can be adjusted in the portal or can be maintained in a separate function.json file.

Project output structure

A C# function developed and compiled in Visual Studio and deployed to Azure has a slightly different output structure than a C# script function created in the Azure portal.


Figure 1 – C# function output created in VS and deployed to Azure

This is a copy of the directory below ‘\release(or debug)\net461’ on the local file system. As you can see there is a bin folder which contains the output assembly of the project as well as all the referenced assemblies. The function.json contains the bindings generated by the Azure Function tools from the C# code attributes defined.


Figure 2 – C# script output created in Azure Portal

Bindings are defined in function.json, where the actual C# script code is listed in run.csx, un-compiled and readable in the browser.

How to reference a file in the project within the function

How hard can it be, I hear you thinking… Yeah, my thoughts also..

What is the current working directory in the function code?

There are several options for getting a path in .NET
Assembly.GetExecutingAssembly().CodeBase – Gets the location of the assembly as specified originally; the place where the file is found.
Assembly.GetExecutingAssembly().Location – Gets the full path or UNC location of the loaded file that contains the manifest.
Environment.CurrentDirectory – Gets the current directory path of the project.
AppDomain.CurrentDomain.BaseDirectory – Gets the path of the entrypoint of the application or where the current AppDomain is created.

The output for the C# function, locally and published to Azure, as well as the output for the C# script function are displayed in the following figures.


Figure 3 – C# function code output when running locally


Figure 4 – C# function output when published to Azure


Figure 5 – C# script function output running in Azure portal

In all three situations the different possibilities result in a different location returned and none of them are usable in all three situations.
For example the Codebase can be used when using a C# function, but when developing a C# script function this path is totally unusable.

To get information about the function or directory one has to dive into the Azure WebJobs SDK. After all Azure functions are based on WebJobs.

It seems that the method signature can take an additional parameter of type ExecutionContext.
Just add it and it’s ok, like this in a C# function:

public static async Task<HttpResponseMessage> Run([HttpTrigger(AuthorizationLevel.Function, "get", "post", Route = null)]HttpRequestMessage req, TraceWriter log, ExecutionContext executionContext)

Or a C# script function:

public static async Task<HttpResponseMessage> Run(HttpRequestMessage req, TraceWriter log, ExecutionContext executionContext)

Calling the property FunctionDirectory of this context in Visual Studio results in the actual local function directory:

Figure 6 – FunctionDirectory result running locally

So get the parent of this path to get the project directory.

When deployed to Azure it results in D:\home\site\wwwroot\Function1
Figure 7 – FunctionDirectory result deployed to Azure

And using an C# script function this results in ‘D:\home\site\wwwroot\HttpTriggerCSharp1’ which is the function directory over there.


Figure 8 – FunctionDirectory result running C# script function

When adding files and folders to the project in Visual Studio and deploy it to Azure, they are present in the structure:


Figure 9 – File structure

Now the working directory is a known fact, referencing these files in the project is easy.
log.Info(executionContext.FunctionDirectory);
log.Info($”{Directory.GetParent(executionContext.FunctionDirectory).FullName}\\files\\afile.json”);

Summary

To get the project or function directory in an Azure function in Visual Studio or in the portal isn’t rocket science, but it took me some digging around in the SDK to get it.

Viewing all 62 articles
Browse latest View live